15 PBIS Classroom Management Strategies Teachers Can Use
You’ve probably sat through at least one PD session where someone said "just be more positive" and left it at that. Not exactly helpful when a student is throwing pencils across the room. PBIS classroom management takes that vague advice and turns it into something you can actually use, a framework built on evidence-based strategies that teach and reinforce expected behaviors instead of just punishing the unexpected ones.
PBIS (Positive Behavioral Interventions and Supports) works because it shifts the focus from reaction to prevention. Instead of waiting for problems and handing out consequences, you build systems that make good behavior the easier choice. Research backs this up: schools implementing PBIS consistently see reductions in office discipline referrals and improvements in school climate.
Here at The Cautiously Optimistic Teacher, we’re all about giving educators strategies that are practical, not theoretical. That means no fluff, no jargon-heavy frameworks you’ll never touch again. Below, you’ll find 15 PBIS strategies you can bring into your classroom, whether you’re starting from scratch or looking to strengthen what you already have in place.
1. Use quick classroom behavior data
Classroom behavior can feel like it’s everywhere at once, which makes it hard to know where to focus your energy. Data collection doesn’t have to mean clipboards and complicated spreadsheets. Even simple, consistent tracking gives you a clearer picture than memory alone, and it’s a foundational piece of effective PBIS classroom management.
What it is
Behavior data is a record of specific, observable student behaviors over time. Instead of relying on general impressions like "this class is rough," you collect actual information: who is calling out, how often transitions fall apart, or which part of the day tends to go sideways. That information helps you make targeted decisions rather than guessing.
Tracking behavior patterns for just one week can reveal problems you’ve been reacting to blindly for months.
How to implement it
You don’t need a formal system on day one. Start with a simple tally sheet that tracks two or three behaviors you want to decrease or increase. Write the behaviors at the top of a sticky note or a printed sheet, then mark a tally each time you observe them during class.
Once you have a few days of data, look for patterns by time, subject, or seating location. Those patterns tell you where to intervene, not just who to correct.
Examples you can use tomorrow
These three quick formats take under five minutes to set up and require no special tools:
- Tally sheet on a clipboard: Track call-outs, off-task behavior, or transition breakdowns during a single class period.
- Color-coded seating chart: Circle or highlight student names when a specific behavior occurs during a time block.
- End-of-class observation note: Jot two or three behavioral observations in a notebook on your desk right after the bell.
Common mistakes to avoid
The most common problem is tracking too many behaviors at once. If you’re watching for five different things, you’ll lose track of all five. Start with one or two behaviors that have the biggest impact on learning, then expand your categories once the system feels manageable.
Collecting data and never reviewing it is the second pitfall. Schedule a two-minute check at the end of each day so the information actually shapes what you do next.
How to track if it works
Compare your weekly tally totals from the first week to the third week. If you’ve adjusted your approach based on what you found, you should see a shift in frequency. You’re not chasing perfection; you’re looking for a clear downward trend in the behaviors you targeted.
2. Teach 3 to 5 positively stated expectations
Most classroom rules are written to stop bad behavior, which means students spend their day being told what not to do. PBIS classroom management flips that by giving students clear, positive expectations that define what success actually looks like in your room.
What it is
Positively stated expectations are short, memorable phrases that describe desired behaviors rather than prohibited ones. Instead of "no talking during work time," you use "we work quietly and independently." Students respond better to knowing what to do than being warned against what not to do.
How to implement it
Pick three to five expectations that cover the behaviors most important in your classroom. Keep each one short enough to remember without reading from a poster. Post them somewhere visible, introduce them explicitly on day one, and refer back to them consistently throughout the year.
Expectations that stay on the wall and never get mentioned are not classroom norms; they’re decoration.
Examples you can use tomorrow
Here are three formats that work across grade levels:
- Be respectful, be responsible, be ready – broad enough to cover most situations
- We listen actively, we work hard, we support each other – adds a community angle
- Respect yourself, respect others, respect the space – simple and direct
Common mistakes to avoid
Writing more than five expectations dilutes the message and makes them harder to internalize. Students need a short list they can genuinely own, not a crowded wall of rules they tune out after week one.
How to track if it works
Ask students to recite the expectations without looking at the poster. If most can’t, review and reteach them until the phrases stick naturally.
3. Build a classroom expectations matrix
An expectations matrix takes your three to five positively stated expectations and shows students exactly what each one looks like in different classroom settings. It’s one of the most underused tools in PBIS classroom management, and it removes the guesswork that leads to most behavioral problems.
What it is
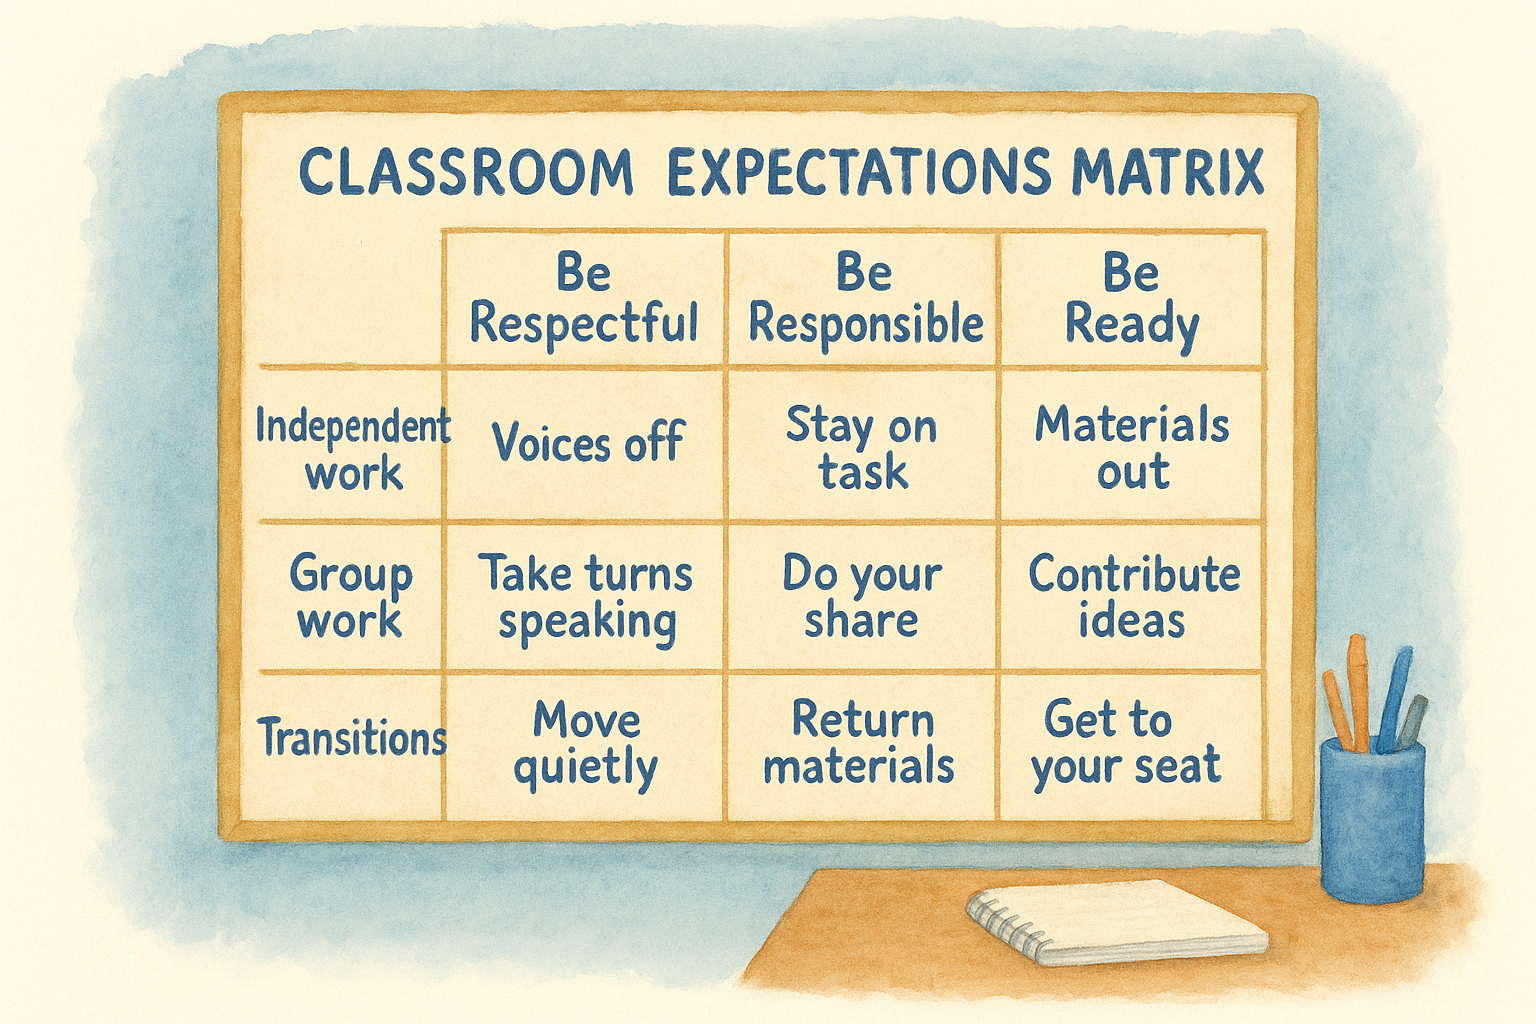
A classroom expectations matrix is a simple chart that pairs your expectations with specific locations or routines in your room. Each cell answers one question: what does this expectation look like in this context? Students stop having to interpret what "be responsible" means during group work versus during independent reading.
A matrix makes abstract expectations concrete, which is the difference between a rule students follow and one they ignore.
How to implement it
Create a grid with your expectations as column headers and your common classroom routines or settings as row headers. Fill in each cell with one clear, observable behavior. Keep the language simple enough that students can read it themselves, and post the matrix somewhere visible in the room.
Examples you can use tomorrow
Here’s a sample structure you can adapt immediately:
| Setting | Be Respectful | Be Responsible | Be Ready |
|---|---|---|---|
| Independent work | Voices off | Stay on task | Materials out |
| Group work | Take turns speaking | Do your share | Contribute ideas |
| Transitions | Move quietly | Return materials | Get to your seat |
Common mistakes to avoid
Filling cells with vague language like "act appropriately" defeats the purpose. Every cell should describe a specific, visible action students can picture and repeat.
How to track if it works
Reference the matrix during lessons and note how often you need to clarify expectations verbally. Fewer clarifications over two weeks signals students have internalized the matrix.
4. Teach routines and practice them like content
Routines are the invisible structure holding your classroom together. When students know exactly what to do during transitions, group work, or material distribution, behavioral disruptions drop significantly because confusion no longer has room to grow. Treating routines as something to explicitly teach, not just announce, is a core move in PBIS classroom management.
What it is
A classroom routine is a repeatable sequence of steps students follow for common events like entering the room, getting supplies, or switching activities. Teaching it like content means you model it, have students practice it, and give corrective feedback on their performance, the same way you’d teach a skill in your subject area.
How to implement it
Break each routine into three to five clear steps, then walk students through those steps explicitly before they attempt it independently. Run the routine multiple times in a single class period early in the year and give immediate feedback until it looks right.
Students who practice a routine correctly four or five times in one session retain it far longer than those who hear it explained once.
Examples you can use tomorrow
Pick one high-traffic routine to teach explicitly this week:
- Entry routine: Sit down, pull out materials, begin the warm-up silently.
- Transition routine: Cap materials, push in chair, move to the new location without talking.
- Dismissal routine: Clear desk, stack chairs if needed, wait for the teacher signal before leaving.
Common mistakes to avoid
Explaining a routine once and assuming students have it rarely works long-term. Skipping practice time means you spend the rest of the semester re-explaining the same basic steps instead of actually teaching content.
How to track if it works
Time your transition routines with a phone stopwatch. Decreasing transition time across two weeks shows the routine is becoming automatic for your students.
5. Use active supervision and proximity
Where you stand during class changes what students do. Active supervision means moving intentionally through your room rather than planting yourself at the front, and it’s one of the simplest PBIS classroom management moves you can make without adding a single new system.
What it is
Active supervision is the practice of continuously scanning, moving, and interacting with students throughout the class period. Proximity is the physical part: being close to a student often defuses low-level behavior before it escalates into something that needs a formal consequence.
How to implement it
Plan a loose circulation path that takes you past every corner of the room during independent or group work. Scan the room every 30 to 60 seconds even when you’re helping one student, so students know your attention isn’t locked in one spot.
Students behave differently when they know you could be standing next to them at any moment.
Examples you can use tomorrow
Try these three approaches during your next class:
- Stand near students who tend to go off-task during transitions instead of managing things from your desk.
- Pause next to a distracted student without speaking; proximity alone often redirects behavior.
- Use the corners and back of the room during independent work instead of always moving through the center aisle.
Common mistakes to avoid
Stationing yourself at your desk or the board signals to students that large parts of the room are unsupervised. Avoid anchoring yourself to any single location for more than two minutes during work time.
How to track if it works
Count how many times you redirect behavior verbally in one class period. After two weeks of active circulation, that number should drop noticeably.
6. Pre-correct before predictable trouble spots
Pre-correction is one of the most underused tools in PBIS classroom management. Instead of waiting for a behavior problem to surface and then reacting to it, you deliver a brief, targeted reminder right before you know things tend to go sideways.
What it is
A pre-correction is a short, proactive statement that tells students what the expected behavior looks like before a high-risk moment arrives. Think of it as a quick preview rather than a warning. You identify where disruptions tend to cluster, then address the behavior before it starts instead of cleaning up the aftermath.
How to implement it
Scan your week and note two or three predictable trouble spots: the transition before lunch, the switch from direct instruction to group work, or the final five minutes of class. Before each one, deliver a calm, specific statement that names the expected behavior without referencing what went wrong last time.
Pre-correction works best when it’s brief and behavior-specific, not a recap of past problems.
Examples you can use tomorrow
Try these before your next high-risk moment:
- "Before we move into groups, remember: voices stay at a level two and everyone contributes."
- "We have five minutes left. Materials go away quietly before the bell rings."
- "As you walk to the library, keep your hands to yourself and stay with the group."
Common mistakes to avoid
Turning pre-correction into a lengthy reminder of previous failures drains its effectiveness immediately. Keep it to one or two sentences focused on what you want to see, not what frustrated you before.
How to track if it works
Count how often you issue verbal redirections during your targeted moments with and without pre-correction. Fewer redirections over two weeks confirms the strategy is working.
7. Increase opportunities to respond
Passive classrooms breed off-task behavior. When students sit for long stretches without being asked to do anything active, disengagement fills that space naturally. Increasing opportunities to respond (OTR) is a high-leverage PBIS classroom management strategy because it keeps student attention tied to the lesson, leaving less room for disruption.
What it is
An opportunity to respond is any instructional moment where you prompt a student to actively engage with content, verbally, in writing, or with a physical signal. Research consistently links higher OTR rates to both improved academic outcomes and fewer behavioral incidents because engaged students simply have less time and motivation to act out.
Aim for four to six opportunities to respond per minute during direct instruction to maintain meaningful engagement levels.
How to implement it
Build response opportunities directly into your lesson plan rather than leaving them to chance. Rotate between individual and group formats so you’re not relying on the same students every time. Use structured cues like "everyone, write your answer now" or "show me on your whiteboard in three, two, one" to keep the pace moving.
Examples you can use tomorrow
These formats take no preparation time and work across grade levels:
- Choral response: The whole class answers a factual question aloud together on your signal.
- Mini whiteboards or scrap paper: Students write a response and hold it up simultaneously.
- Think-pair-share: Give 30 seconds to think, then partners discuss before you cold call.
Common mistakes to avoid
Calling only on volunteers turns OTR into a spectator sport for the rest of the class. Every student needs a response prompt, not just the ones with their hands up.
How to track if it works
Count how many whole-class response prompts you deliver in a 10-minute window. Track that number weekly and watch whether behavioral interruptions drop as your OTR rate climbs.
8. Reinforce with specific, behavior-linked praise
Generic praise feels good in the moment but teaches nothing. Specific, behavior-linked praise names the exact action you want repeated, which makes it a core reinforcement tool in PBIS classroom management rather than just a feel-good comment.
What it is
Behavior-linked praise connects your positive feedback directly to the observable action the student performed. Instead of "good job," you say "you stayed on task for the entire work block without prompting." That specificity tells the student exactly what to repeat and signals that you’re actually paying attention.
Praise that names the behavior is up to three times more effective at increasing that behavior than general positive comments.
How to implement it
Deliver praise within a few seconds of the target behavior to strengthen the connection between the action and the reinforcement. Keep your tone natural and calm, not theatrical, so students receive it as genuine feedback rather than performance.
Examples you can use tomorrow
These phrases work across grade levels and require no preparation:
- "You transitioned to your seat quickly and quietly when I gave the signal."
- "Your group kept voices at a level two during the entire activity."
- "You stayed in your seat and finished the task even when it got challenging."
Common mistakes to avoid
Praising effort alone without connecting it to a specific behavior leaves the message vague. Also avoid praising the same two or three students repeatedly, which signals to the rest of the class that the system isn’t watching them.
How to track if it works
Keep a daily tally of specific praise statements delivered. Track whether the targeted behaviors increase in frequency over two weeks as your praise rate climbs.
9. Use a 5 to 1 positive to corrective ratio
The ratio between positive and corrective feedback you deliver shapes the entire emotional climate of your classroom. Research in PBIS classroom management consistently points to a 5 to 1 ratio as the threshold where students feel safe, supported, and willing to take risks rather than shutting down when challenged.
What it is
The 5 to 1 ratio means five positive interactions for every one corrective interaction with each student. A positive interaction includes specific praise, a friendly greeting, a check-in about their work, or any brief encouraging comment. A corrective interaction includes a redirection, a consequence, or a behavior correction. The ratio works because it builds enough relational trust that a correction reads as guidance rather than an attack.
When students feel genuinely valued, they respond to corrections without shutting down or pushing back.
How to implement it
Start by tracking your ratio informally for one class period using a two-column tally: positive interactions on one side, corrective on the other. Most teachers find their ratio sits closer to 1 to 1 on difficult days. Once you see that gap, deliberately front-load positive interactions before issuing any corrections.
Examples you can use tomorrow
- Greet students by name at the door each day
- Comment on specific effort during independent work rather than general performance
- Deliver one genuine check-in per student about their work each week
Common mistakes to avoid
Applying the ratio only to students with frequent behavioral issues misses the point entirely. Every student in your room needs that same balance, not just the ones who cause visible problems.
How to track if it works
Run your two-column tally once a week for three consecutive weeks. A ratio climbing toward 5 to 1 over that span shows you’re building the trust and climate that PBIS depends on.
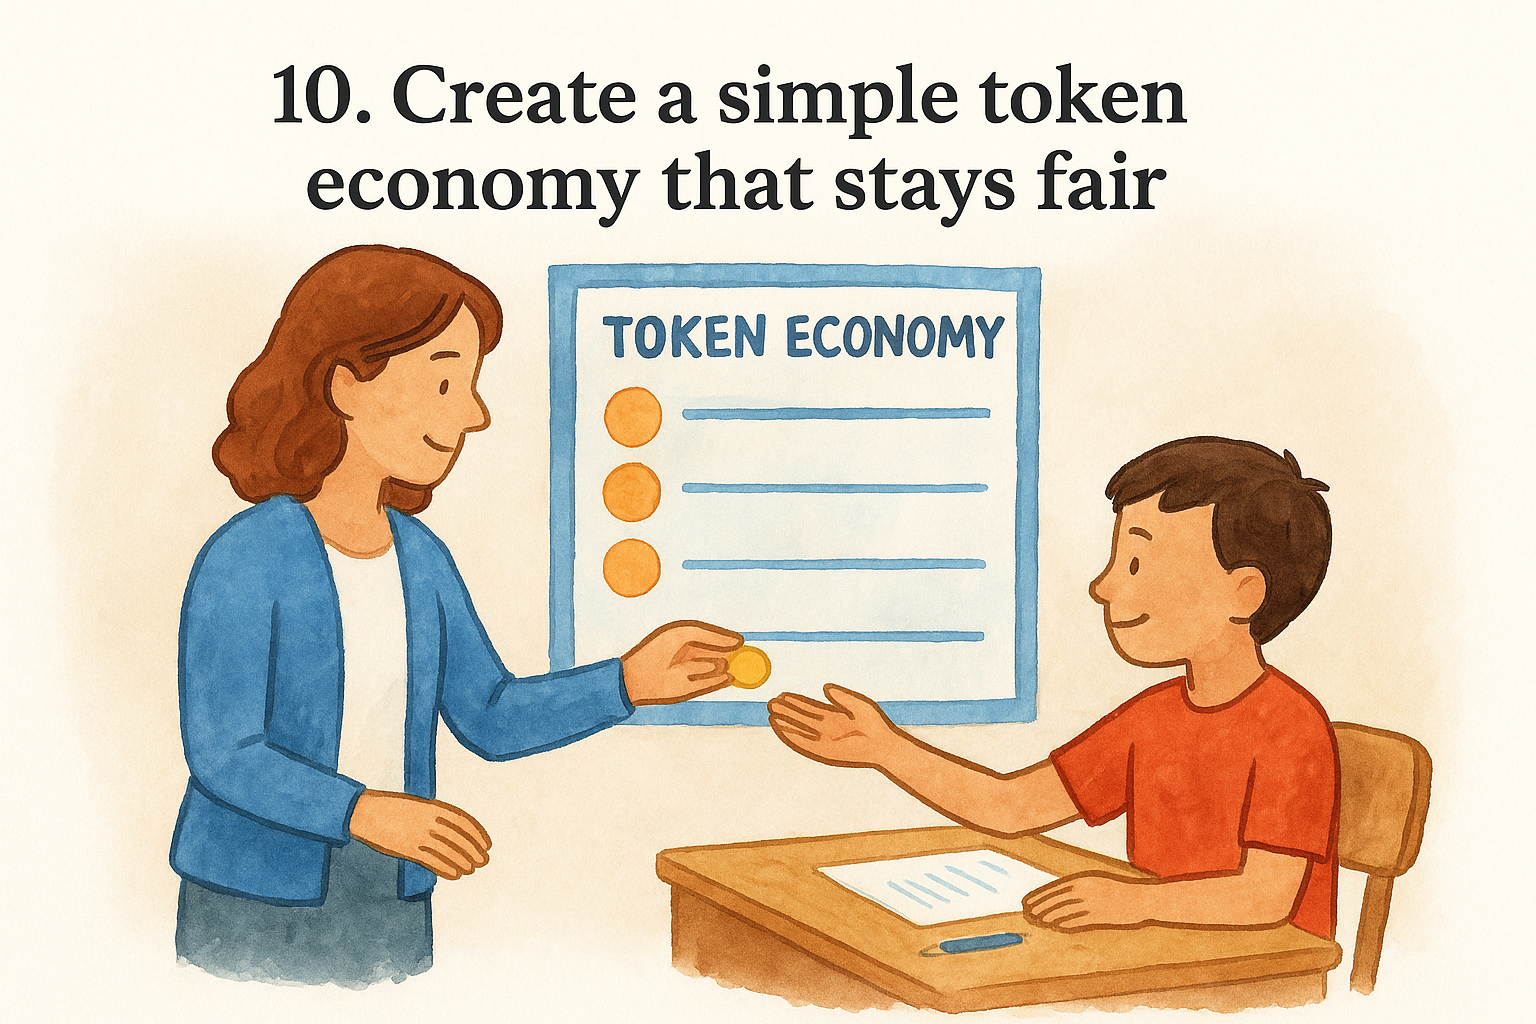
10. Create a simple token economy that stays fair
A token economy gives students a concrete, tangible way to see their behavior pay off. In PBIS classroom management, token systems work because they bridge the gap between the moment a good behavior happens and a larger reward, keeping students motivated when the next incentive isn’t immediately available.
What it is
Token economies are structured reinforcement systems where students earn tokens (points, stamps, stickers, or tickets) for demonstrating expected behaviors. Tokens accumulate and students exchange them for predetermined rewards from a classroom menu.
Keep your reward menu small, around three to five options, so the system stays manageable for you and meaningful for students.
How to implement it
Start with one clear behavior you want to increase, then assign a token to it. Set a realistic exchange rate so students can access small rewards frequently in the beginning before you gradually extend the earning window.
Examples you can use tomorrow
These straightforward formats require minimal setup:
- Punch cards: Students get a punch for each expected behavior; a full card earns a reward.
- Points on a tracker: Each student has a simple tally column on a shared sheet you update daily.
- Class tickets: Students write their name on a slip and drop it in a jar for a weekly draw.
Common mistakes to avoid
Handing out tokens inconsistently or only to the same students undermines the whole system. Every student needs a fair shot at earning tokens based on observed behavior, not on how much you already favor them.
How to track if it works
Compare your daily redirection count and office referral frequency before and after you introduce the token system. Fewer redirections after two weeks shows the system is doing its job.
11. Use group contingencies to build teamwork
Group contingencies make the whole class stakeholders in collective behavior. When students know their actions affect everyone around them, peer motivation becomes a powerful force that supplements your individual reinforcement strategies and strengthens PBIS classroom management at the whole-class level.
What it is
A group contingency ties a shared reward to the behavior of the entire class, a small team, or a randomly selected student. Three formats exist: dependent (one student’s behavior determines the reward), independent (everyone earns based on individual performance), and interdependent (the group earns the reward together when everyone meets the target).
Interdependent group contingencies are the most effective format for building genuine classroom community and shared accountability.
How to implement it
Pick one specific target behavior and set a clear, observable criterion the group must meet. Communicate the goal upfront so students understand exactly what they’re working toward. Keep the reward accessible and simple so the system doesn’t become a logistics problem for you to manage daily.
Examples you can use tomorrow
These two formats require minimal setup and work across grade levels:
- Whole-class points: The class earns a point every transition that happens without a verbal reminder; 10 points unlocks a free-choice activity on Friday.
- Team tallies: Divide students into groups of four and track expected behaviors per group each period.
Common mistakes to avoid
Never design a system where one student’s behavior punishes everyone else. That breeds resentment rather than teamwork, which undercuts the entire purpose of a group contingency.
How to track if it works
Compare your whole-class redirection frequency before and after introducing the contingency. Fewer whole-class corrections over two weeks signals the group dynamic is shifting in the right direction.
12. Correct behavior with brief, calm redirection
When a student breaks an expectation, how you respond in that moment matters as much as what you say. Brief, calm redirection keeps the correction proportionate to the behavior and preserves the instructional momentum you’ve built. It’s one of the quieter tools in PBIS classroom management, but it carries real weight.
What it is
A brief, calm redirection is a short, neutral correction delivered privately or quietly that names the expected behavior without escalating the moment. You’re not ignoring the behavior; you’re correcting it in the least invasive way possible so the rest of the class stays on track.
How to implement it
Keep your tone flat and matter-of-fact, not frustrated or theatrical. Move close to the student, state the expected behavior in one sentence, then walk away and give them a few seconds to comply without standing over them.
Waiting silently after a redirection gives students the chance to self-correct without turning the moment into a power struggle.
Examples you can use tomorrow
These short phrases work immediately without any preparation:
- "Eyes on your paper, please." Then move on.
- "Voices off during work time. Thank you."
- "Feet on the floor and back to work."
Common mistakes to avoid
Avoid lengthy explanations during a redirection. The more words you add, the more the behavior takes center stage in front of the class. Skip public corrections when a quiet word near the student’s desk will accomplish the same result with less friction.
How to track if it works
Count how often redirections escalate into larger confrontations over two weeks. Fewer escalations signals your delivery is landing with the right tone and brevity.
13. Plan error correction for major behaviors
Brief redirection handles most problems, but some behaviors need a more structured response. Without a clear plan for serious incidents, you react inconsistently, and students quickly learn that major disruptions produce unpredictable results. Planning your error correction process in advance is a deliberate piece of solid PBIS classroom management.
What it is
Error correction for major behaviors is a predetermined, step-by-step process you follow when a behavior exceeds what a simple redirection can address. It typically includes a calm acknowledgment of the behavior, a private conversation, a clear statement of the consequence, and a brief reteach of the expected behavior.
How to implement it
Write out your two or three-step correction sequence before you need it. Walk students through that sequence at the start of the year so no one is surprised when it happens. Deliver corrections privately whenever possible to reduce the audience effect that often escalates situations.
A consistent correction process removes emotion from the interaction, which protects both you and the student.
Examples you can use tomorrow
Your sequence might look like this in practice:
- Step 1: Name the behavior and remove the student from the situation briefly.
- Step 2: State the consequence calmly and reteach the expected behavior in one sentence.
- Step 3: Return the student to the activity with a fresh start.
Common mistakes to avoid
Avoid improvising consequences on the spot for major behaviors. That inconsistency teaches students that outcomes depend on your mood rather than the behavior itself, which erodes trust quickly.
How to track if it works
Log the frequency of major corrections weekly. A declining count over three weeks confirms your process is working.
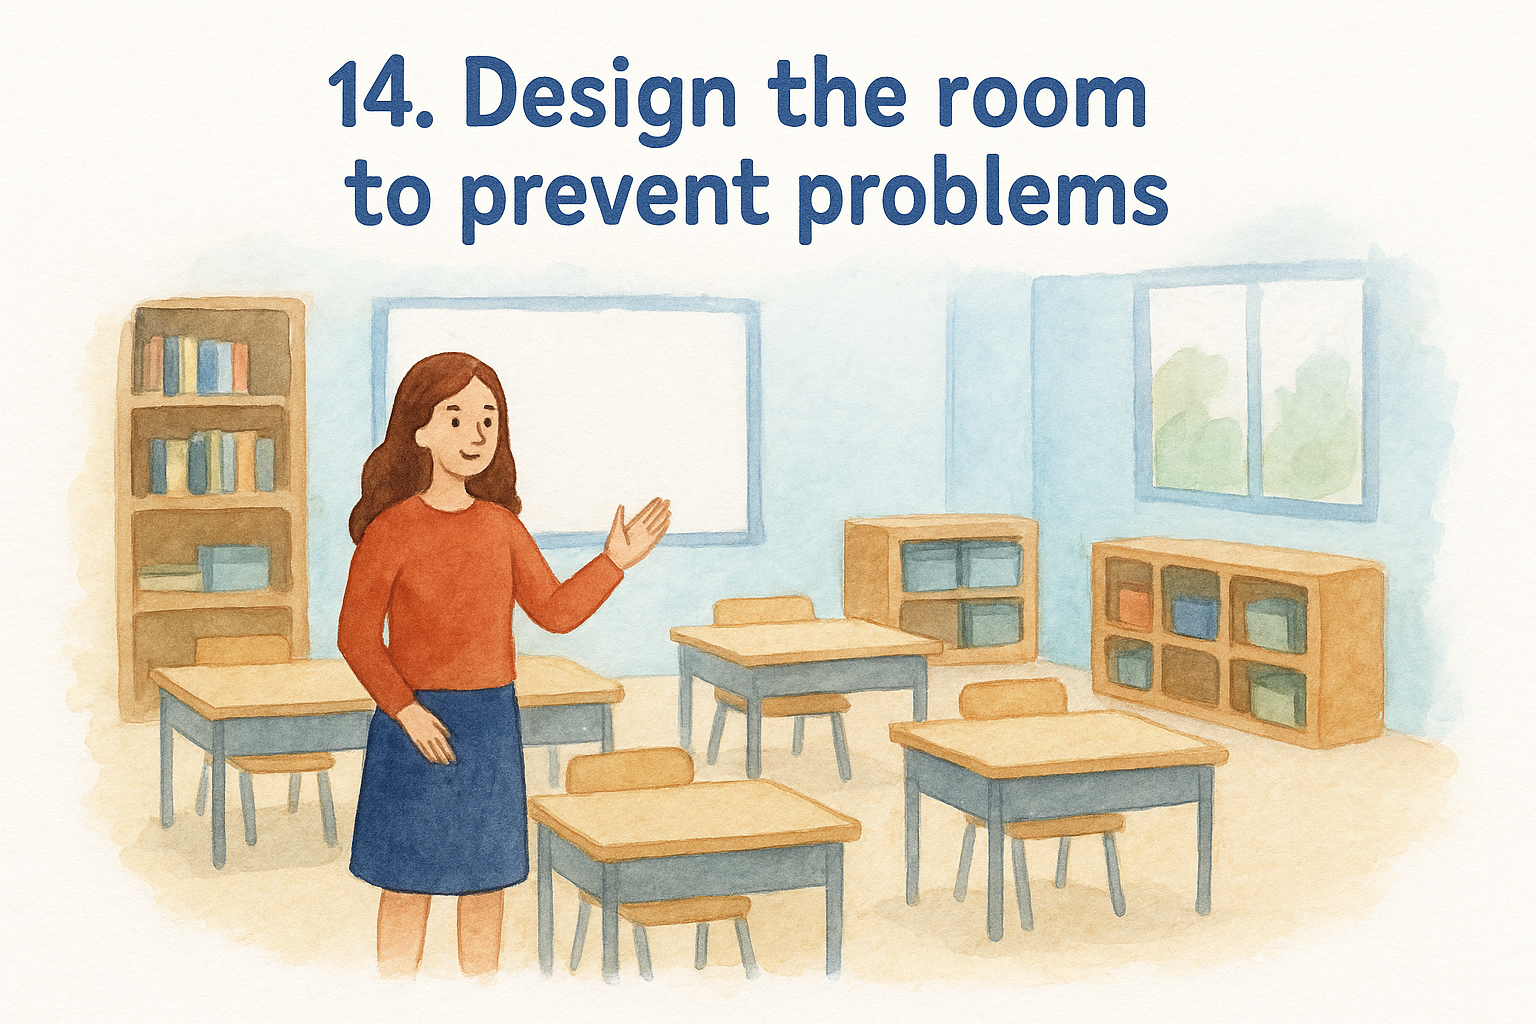
14. Design the room to prevent problems
Your physical classroom setup either supports expected behavior or quietly works against it. PBIS classroom management treats the environment as a prevention tool, not just a backdrop, and the way you arrange furniture, materials, and sight lines directly influences how students behave before you say a single word.
What it is
Room design as a behavioral strategy means deliberately arranging your space to reduce opportunities for disruption. Clear pathways, visible work zones, and organized materials lower the chance that confusion about where to go or what to grab creates behavioral noise in the first place.
How to implement it
Walk your room before students arrive and identify friction points: blocked sightlines, crowded supply areas, or seating arrangements that put high-traffic students together. Rearrange based on what you observe, then adjust again after the first two weeks once you see how students actually move through the space.
A room designed around student movement patterns prevents most low-level disruptions before they start.
Examples you can use tomorrow
These three quick changes have immediate impact:
- Move supply stations to the edges of the room so students don’t cross paths during transitions.
- Seat students who need proximity support near your most frequent stopping points during circulation.
- Create a clear line of sight from your desk to every corner of the room.
Common mistakes to avoid
Keeping a furniture arrangement that clearly isn’t working because rearranging feels like too much effort is the main trap here. Fix layout problems early in the year before habits form around a broken setup.
How to track if it works
Count transition-related disruptions weekly. Fewer incidents after a layout change confirms your room is doing real prevention work for you.
15. Teach self-regulation with a calm reset space
Students who can’t regulate their emotions and energy during class aren’t choosing to disrupt; they often lack the specific skills to reset independently. A designated calm reset space gives students a structured, low-stakes way to regain focus without leaving the room, which supports both individual wellbeing and broader PBIS classroom management goals.
What it is
A calm reset space is a small, designated area in your classroom where students can briefly step away from a situation to self-regulate. It’s not a punishment zone. Students use it proactively or upon teacher request to use a simple reset tool, then return to the activity ready to engage.
How to implement it
Choose a corner of your room that’s visible to you but slightly removed from the main instructional area. Stock it with one or two simple tools: a feelings check card, a breathing steps visual, or a brief sensory item. Teach students exactly how and when to use it before anyone needs it.
Students use calm-down spaces most effectively when they’ve practiced the steps during a calm moment, not for the first time mid-meltdown.
Examples you can use tomorrow
Set up the space with these three low-cost items: a laminated "5 breaths" card, a feelings identification chart, and a two-minute sand timer so students know when to return.
Common mistakes to avoid
Avoid letting students self-select the space whenever they want without clear criteria. Without boundaries, it quickly becomes an avoidance tool rather than a genuine regulation strategy.
How to track if it works
Log how often students use the space and whether they return to task independently. Increasing independent returns over two weeks signals the strategy is building real self-regulation skills.

A simple plan for next week
Don’t try to implement all 15 strategies at once. Pick two or three that match your biggest current challenge and focus there for the next week. If transitions are rough, start with pre-correction and the classroom expectations matrix. If engagement is the issue, try increasing opportunities to respond alongside specific behavior-linked praise. PBIS classroom management works through consistency, not through attempting everything simultaneously and burning out by Wednesday.
Track one target behavior this week using a simple tally sheet. By Friday, you’ll have real data to guide your next decision instead of impressions. That small shift, from guessing to knowing, is how sustainable classroom change actually starts. Deliberate actions compound quickly when you apply them every day with intention.
Building a stronger classroom takes the right tools in your corner. For practical resources and strategies built specifically for educators, visit The Cautiously Optimistic Teacher and find what supports your teaching practice right now.