How To Implement Project Based Learning In Your Classroom
You’ve probably heard colleagues rave about project-based learning, watched a PD presentation on it, or stumbled across stunning student projects on social media. Then you sat down at your desk and thought, "Okay, but where do I actually start?" Figuring out how to implement project based learning can feel overwhelming when you’re staring at a blank planning document and a calendar full of standards to cover. The gap between PBL theory and classroom reality is real, and it’s where most teachers get stuck.
Here’s the thing: project-based learning doesn’t require you to scrap everything you’re already doing. It asks you to restructure how students interact with content, moving them from passive receivers to active problem-solvers. When done well, PBL boosts engagement, deepens understanding, and builds skills that standardized tests can’t fully measure, like collaboration, self-direction, and critical thinking.
At The Cautiously Optimistic Teacher, we build resources that help educators work smarter without sacrificing rigor. This guide breaks PBL down into concrete, manageable steps, from choosing a driving question and aligning projects with your standards, to managing the messy middle and assessing the final product. Whether you’re attempting your first project or refining your tenth, you’ll walk away with a practical framework you can adapt to your grade level, your subject, and your students.
What project-based learning is and what you need
Project-based learning is a teaching approach where students investigate a real-world question, problem, or challenge over an extended period and produce a meaningful product or presentation that shows what they learned. Unlike a traditional unit that ends with a test, PBL centers on a sustained inquiry process where students ask questions, gather evidence, apply knowledge, and revise their work based on feedback. The Buck Institute for Education (now PBLWorks) defines it through several key design elements: a challenging problem, sustained inquiry, student voice and choice, reflection, critique and revision, and a public product.
PBL is not a one-off "fun project" tacked onto the end of a unit. It is the unit, and the project drives instruction from day one.
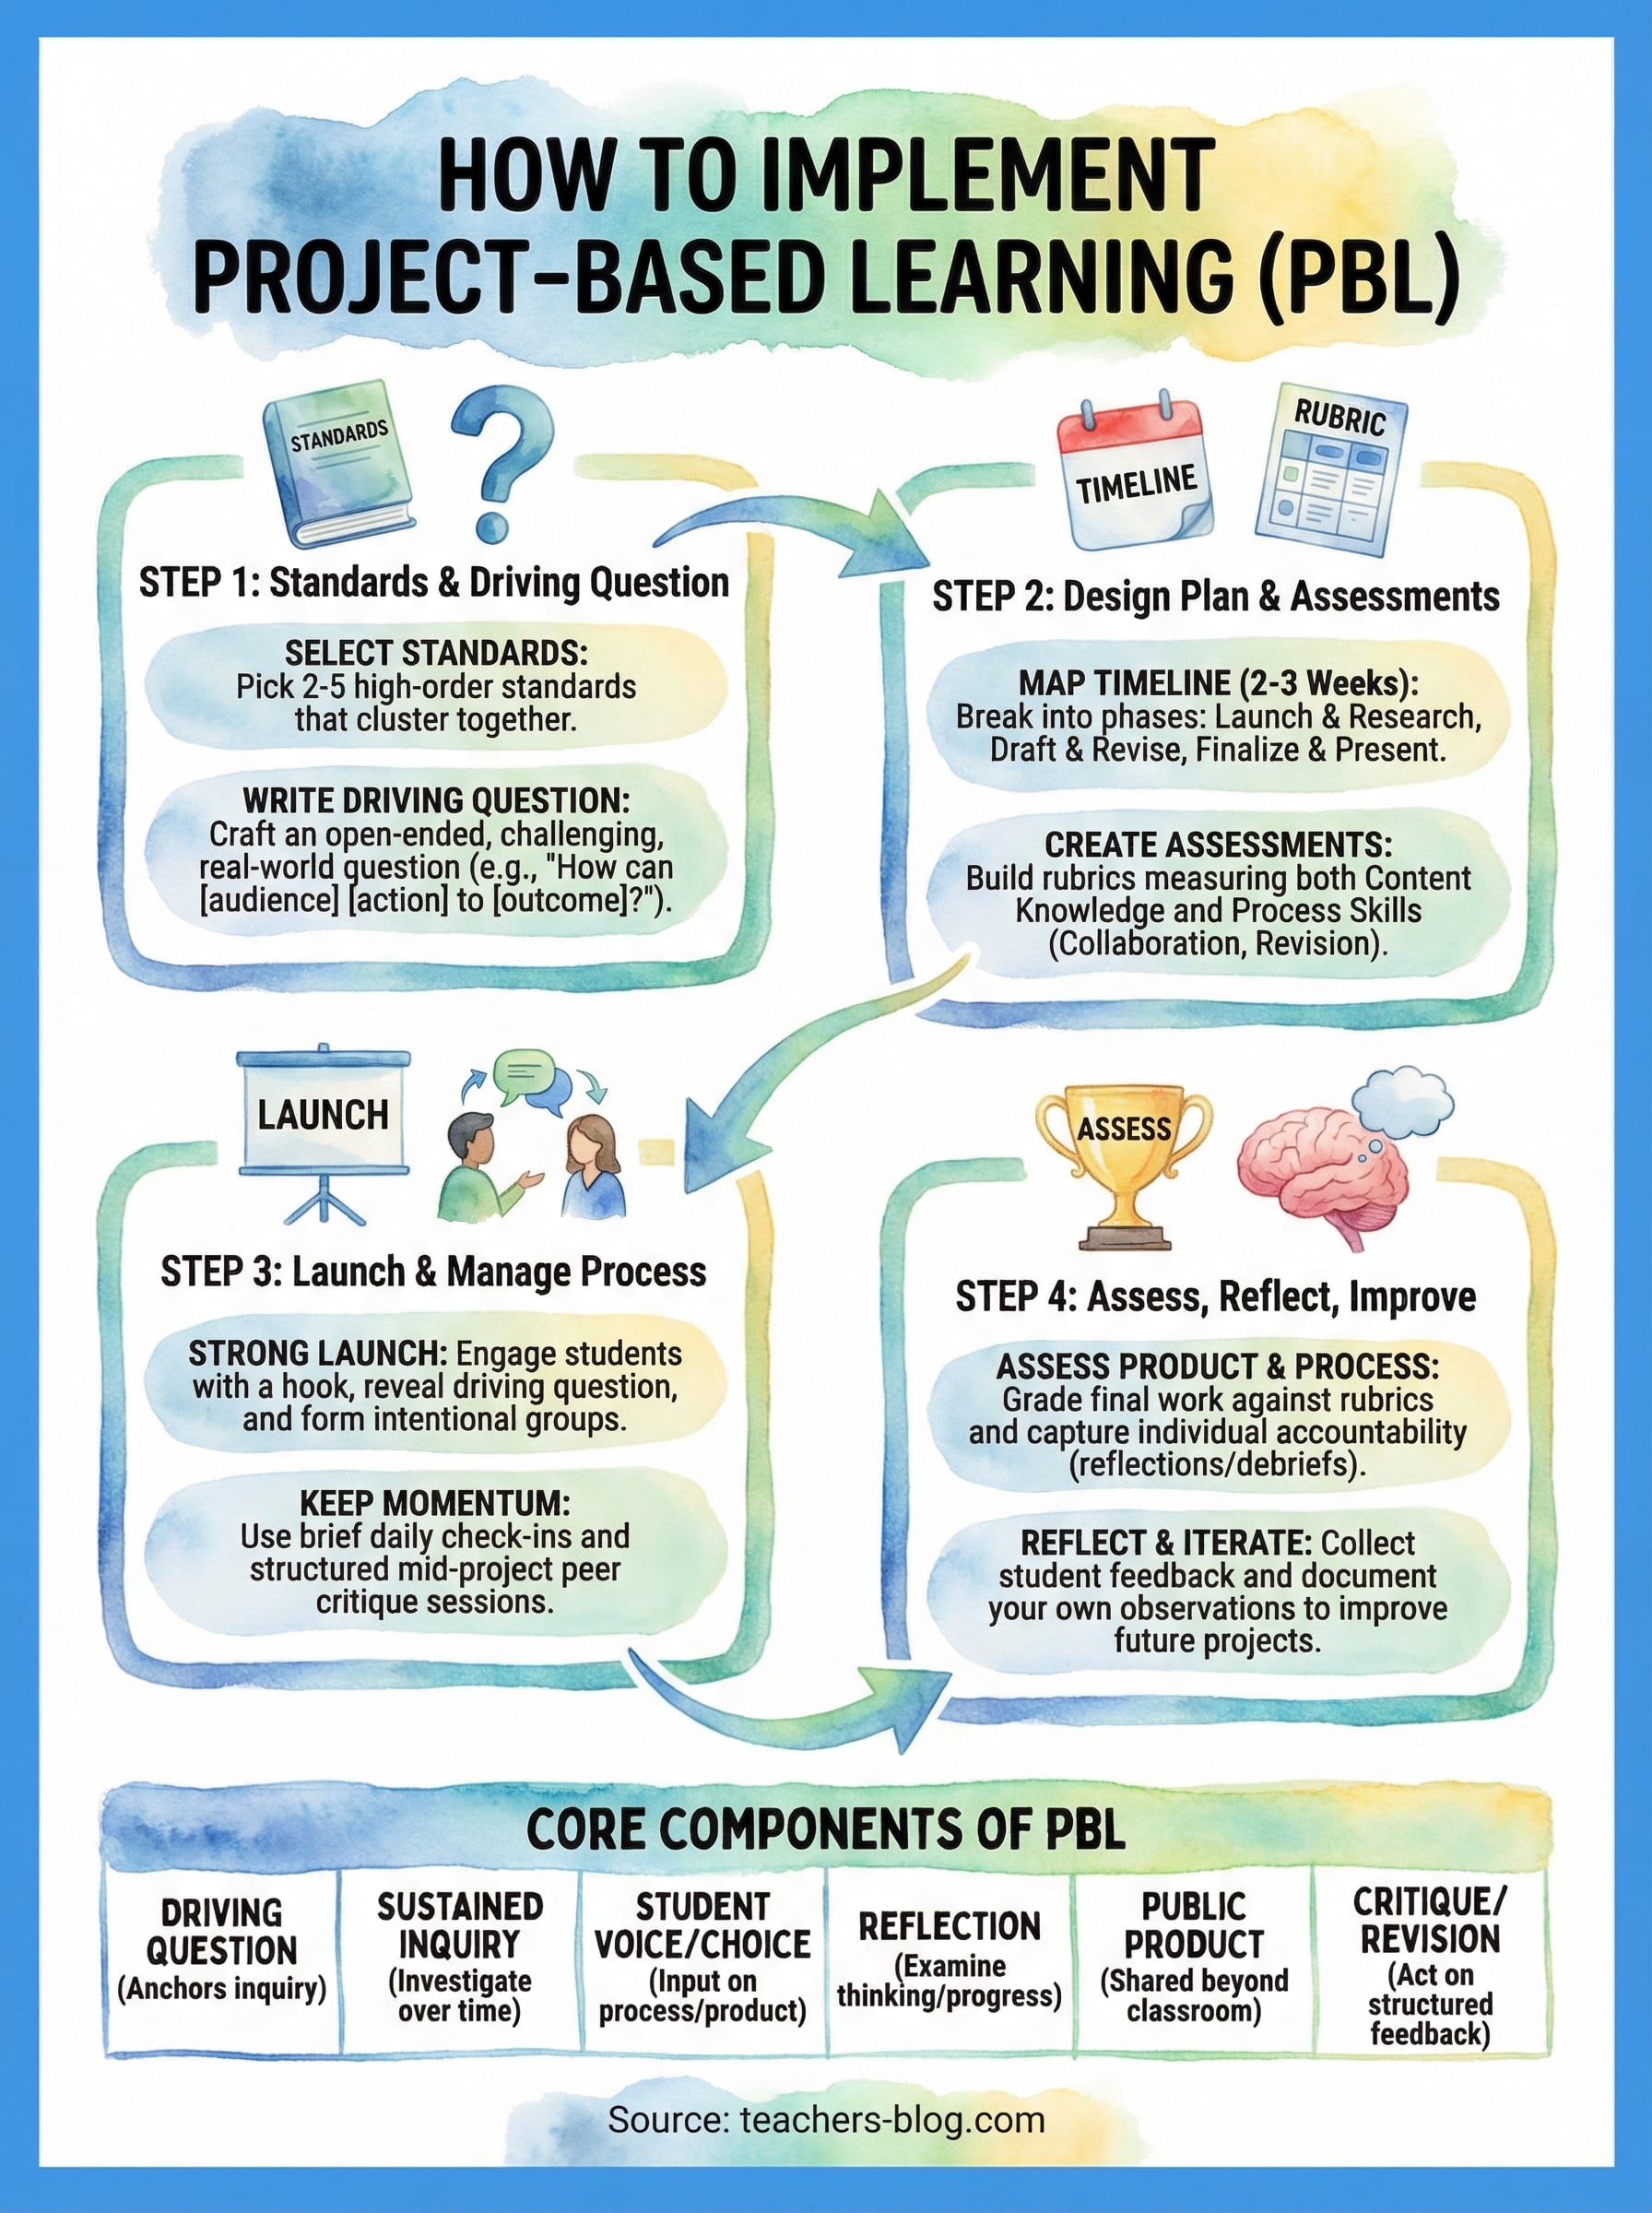
The core components of PBL
Every strong PBL experience shares a few non-negotiable features. The driving question sits at the center of the entire project. It needs to be open-ended, challenging, and connected to issues students can genuinely engage with. The table below breaks down each component you should understand before you plan anything:

| Component | What it means in practice |
|---|---|
| Driving Question | An open-ended question that anchors inquiry (e.g., "How can we design a community space that actually serves our neighborhood?") |
| Sustained Inquiry | Students investigate over days or weeks, not a single class period |
| Student Voice and Choice | Students have input on how they investigate and what they create |
| Reflection | Students regularly examine their own thinking and progress |
| Public Product | The final work is shared with an audience beyond the teacher |
| Critique and Revision | Students receive and act on structured feedback before submitting final work |
What you need before you start
Before you figure out how to implement project based learning in your classroom, you need a few concrete things in place. First, identify a content area and a time block of at least two to three weeks where you have enough flexibility to let students investigate, collaborate, and revise. You cannot run a meaningful PBL unit in three class periods, so protect that time on your calendar before you commit.
Second, gather your standards documentation and decide which standards the project will address. You should also think through what technology, materials, or community resources your students will need. A basic pre-launch checklist includes: a printed or digital copy of your relevant standards, access to research tools, a clear collaboration structure for group work, and a system for tracking individual student contributions inside a group setting. Having these in place before day one prevents most of the common PBL headaches.
Step 1. Choose standards and write a driving question
One key part of how to implement project based learning successfully is anchoring every decision in your standards from the very beginning. Pull up your state or district standards documents and identify two to five standards that can genuinely be explored through extended inquiry. Look for standards that require higher-order thinking, analysis, evaluation, or creation, because those translate naturally into project work rather than a worksheet.
Start with your standards
Narrow your standards before you build anything else. Pick standards that cluster well together, meaning they can be addressed through the same topic or problem. For example, a 9th-grade ELA teacher might combine a reading informational text standard with a writing argument standard and a speaking and listening standard into a single project. That kind of pairing gives your unit academic substance without spreading students too thin.
Before you move forward, run each candidate standard through these three questions:
- Can a student investigate this standard through a real-world scenario?
- Does this standard require producing something, such as an argument, an analysis, or a solution?
- Can you assess this standard through a product rather than only a test?
If you answer yes to all three, that standard belongs in your project.
Write a driving question that does real work
Your driving question is the engine of the entire unit, so it needs to be specific enough to direct inquiry but open enough to allow multiple valid responses. A weak driving question reads like a test prompt. A strong one sounds like something a professional or community member would genuinely wrestle with.
The best driving questions make students feel like they are solving something real, not just completing another assignment.
Use this fill-in template to build yours: "How can [audience] [take meaningful action] so that [real-world outcome]?" For example: "How can our school reduce food waste so that we lower our environmental impact?"
Step 2. Design the project plan and assessments
Once you have your standards and driving question locked in, you need a concrete plan before students ever see the project. This is the structural work that determines whether a project runs smoothly or falls apart in week two. Knowing how to implement project based learning means treating your planning phase as seriously as your teaching phase.
Build a week-by-week project calendar
Map your entire project across a calendar before you print a single handout. Break the timeline into three broad phases: launch and research, build and draft, and revise and present. Then assign specific tasks to each week so you always know what students should be producing. The table below gives you a three-week scaffold you can adjust based on your own schedule:
| Week | Focus | Student Output |
|---|---|---|
| Week 1 | Launch driving question, research, and gather evidence | Research notes, source list |
| Week 2 | Draft the product, get peer feedback, revise | First draft, peer feedback form |
| Week 3 | Finalize product, prepare presentation, present publicly | Final product, reflection |
If students do not know exactly what they are working toward each day, the project loses momentum fast.
Create assessments that match the work
Your assessments need to do two jobs: measure whether students met your standards and give students clear targets to aim for during the process. Build a rubric that addresses both the content knowledge and the process skills, such as collaboration, revision, and presentation quality. Share the rubric on day one so students use it as a working tool, not a surprise at the end. A simple four-column rubric with categories like "exceeds expectations," "meets expectations," "approaching," and "beginning" gives you a grading structure that stays manageable while still capturing the full range of student performance.
Step 3. Launch the project and manage the process
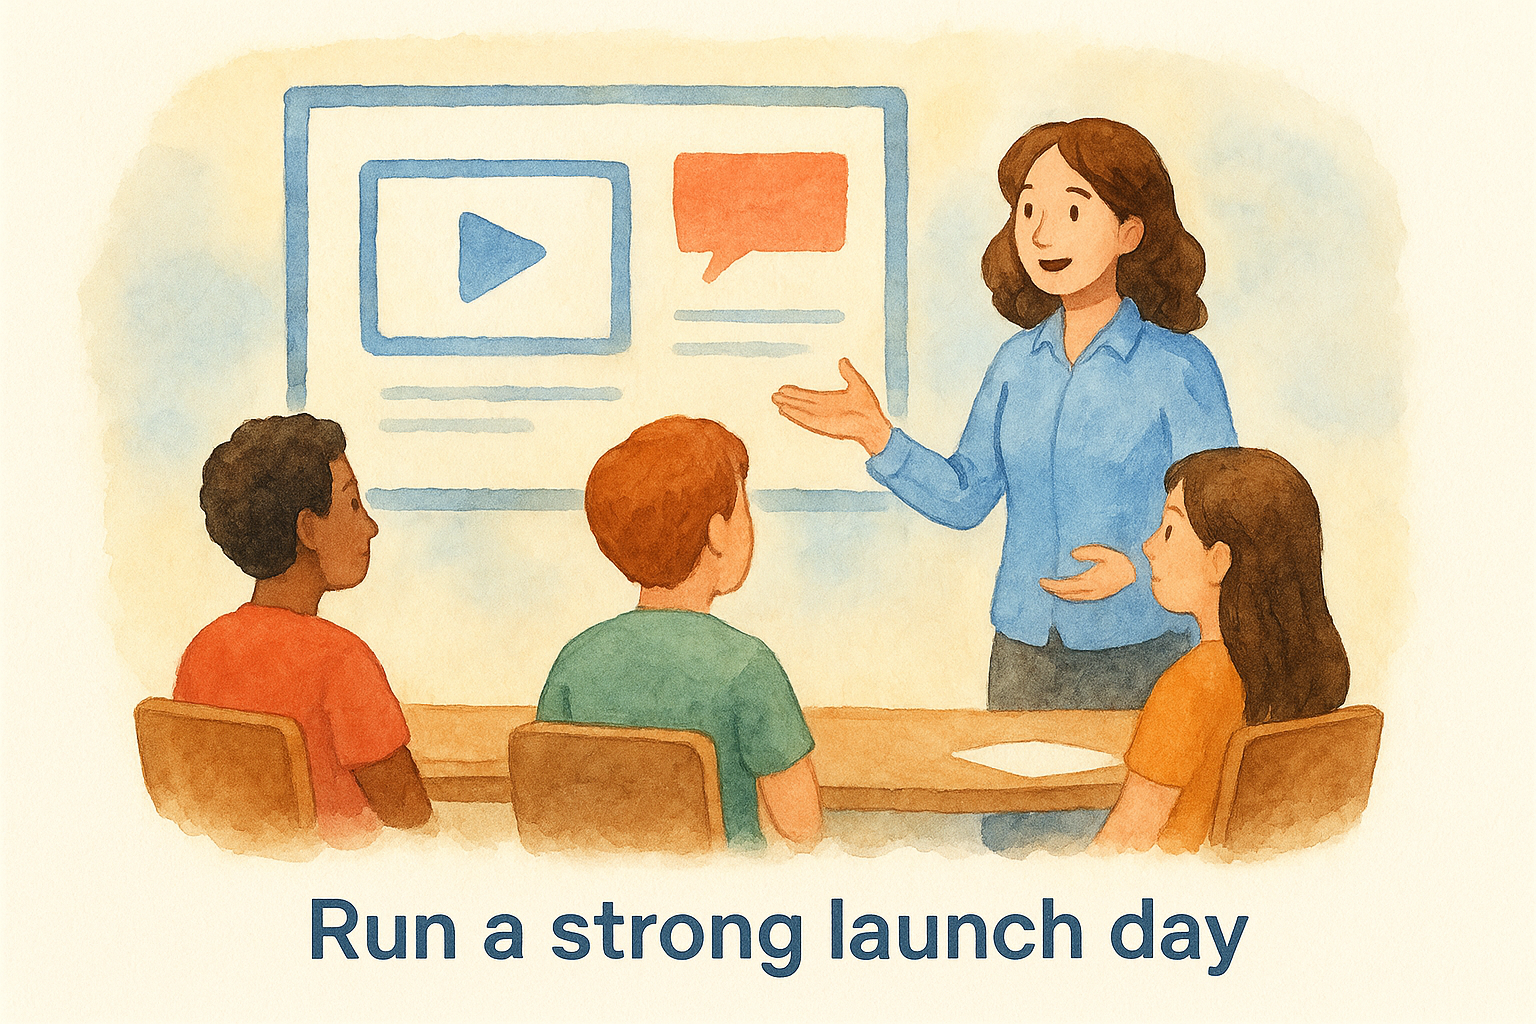
The launch day sets the tone for everything that follows. Your students need to feel the relevance of the driving question from the first ten minutes of the project, not after a week of front-loaded instruction. Knowing how to implement project based learning well means understanding that how you introduce the project directly determines how seriously students engage with it across the full timeline.
Run a strong launch day
Hook students before you explain anything. Open with a short video, a guest speaker, a news article, or a provocative scenario that connects your driving question to something real. Once students are engaged, reveal the driving question and walk through the rubric so they understand exactly what success looks like from day one. Then form groups intentionally, not randomly, by mixing skill sets and work styles so each team has a realistic shot at functioning well together.
A strong entry event turns the driving question from a teacher assignment into a genuine problem students want to solve.
Use this launch day checklist to keep yourself on track:
- Show the entry event (video, article, scenario, or speaker)
- Reveal and discuss the driving question
- Distribute and walk through the rubric
- Form groups and assign initial roles
- Set the Week 1 goal and first checkpoint date
Keep momentum during the middle weeks
The middle weeks are where most projects lose energy, and your job is to prevent that drop before it starts. Build in brief daily check-ins, no more than five minutes, where groups report what they finished and what they need next. These short touchpoints let you spot struggling teams before they fall behind. Schedule at least one structured peer critique session mid-project so students revise their work before the final stretch rather than rushing corrections at the last minute.
Step 4. Assess learning, reflect, and improve next time
The final step in how to implement project based learning effectively is treating assessment and reflection as a two-part process, not a single grade at the end. You need to evaluate both what students learned and how the project itself performed as a teaching tool, because that dual lens is what lets you improve each time you run a PBL unit.
Assess the final product and the process
Score student work against the rubric you shared on day one, which makes grading fair and defensible for both you and your students. Beyond the final product, consider whether your assessment captured individual accountability within group work. A short individual written reflection or a brief verbal debrief helps you separate what the group produced from what each student actually understands.
Use these questions to guide your final assessment review:
- Did each student meet the target standards, or only the group as a whole?
- Does the product show evidence of revision based on feedback?
- Can students explain their reasoning during a brief one-on-one conversation?
Run a structured reflection with students and yourself
Ask students to complete a short exit reflection before the project closes. A simple three-prompt format works well: what they learned about the content, what they would do differently as a collaborator, and one question they still have.
The most useful data you collect after a PBL unit is not the final grade but the honest student reflections that tell you where the process broke down.
After students leave, document your own observations while the unit is still fresh. Note what confused students, which checkpoints worked, and what you would adjust on the project timeline. Those notes become your planning document for the next project, and they are worth more than any template you can download.
Wrap Up and Your Next Move
Now you have a complete picture of how to implement project based learning from the first planning decision to the final student reflection. The framework is straightforward: anchor your project in standards, write a driving question that sparks genuine inquiry, plan your timeline before students see anything, launch with a strong entry event, and use reflection to improve each time.
The hardest part is not the planning. It is committing to that first project and trusting the process when the middle weeks feel uncertain. Start small if you need to. Pick one unit, protect two to three weeks on your calendar, and run the framework once. You will learn more from one real PBL experience than from reading about it.
For more strategies and tools built specifically for educators who want practical solutions that hold up in real classrooms, visit The Cautiously Optimistic Teacher. You will find lesson resources, AI-powered tools, and everything else you need to keep strengthening your practice.